The plan
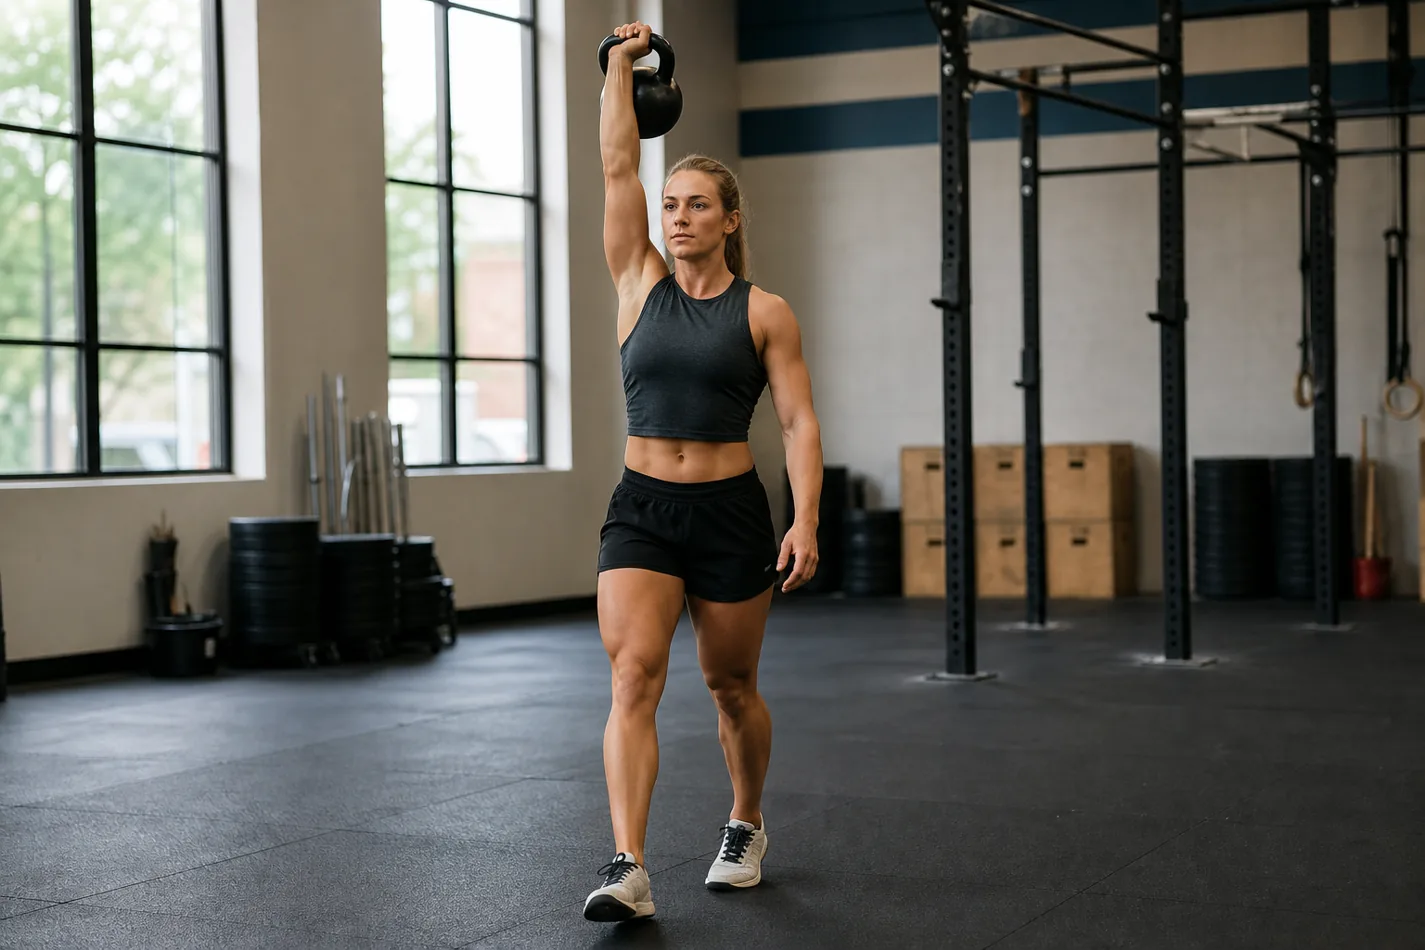
A waiter walk turns a simple loaded carry into an overhead test. One dumbbell or kettlebell goes overhead, the athlete walks, and the body has to keep the shoulder stacked without letting the ribs flare or the low back take over.
It looks like shoulder work, but the better way to read it is full-body control under a small, awkward load. The arm has to stay long. The shoulder blade has to stay active. The feet have to move normally while the torso refuses to lean away from the weight.
- The weight should sit over the shoulder, not drift behind the head or out to the side.
- Keep the ribs down while walking. If the back arches hard, the load is too heavy or too far back.
- Scale distance, load, or arm position before the carry becomes a sloppy overhead hold.
What a waiter walk is actually training
The waiter walk asks for a stable overhead lockout while the body moves underneath it. That is different from standing still with a dumbbell overhead. Each step adds a small wobble, and the athlete has to answer without bending sideways, shrugging, or turning the wrist into the main support.
This is why the movement pairs well with shoulder-to-overhead work, overhead lunge positioning, and handstand hold line. The positions are not identical, but the problem is familiar: stack the load, keep breathing, and do not buy height by throwing the ribs forward.
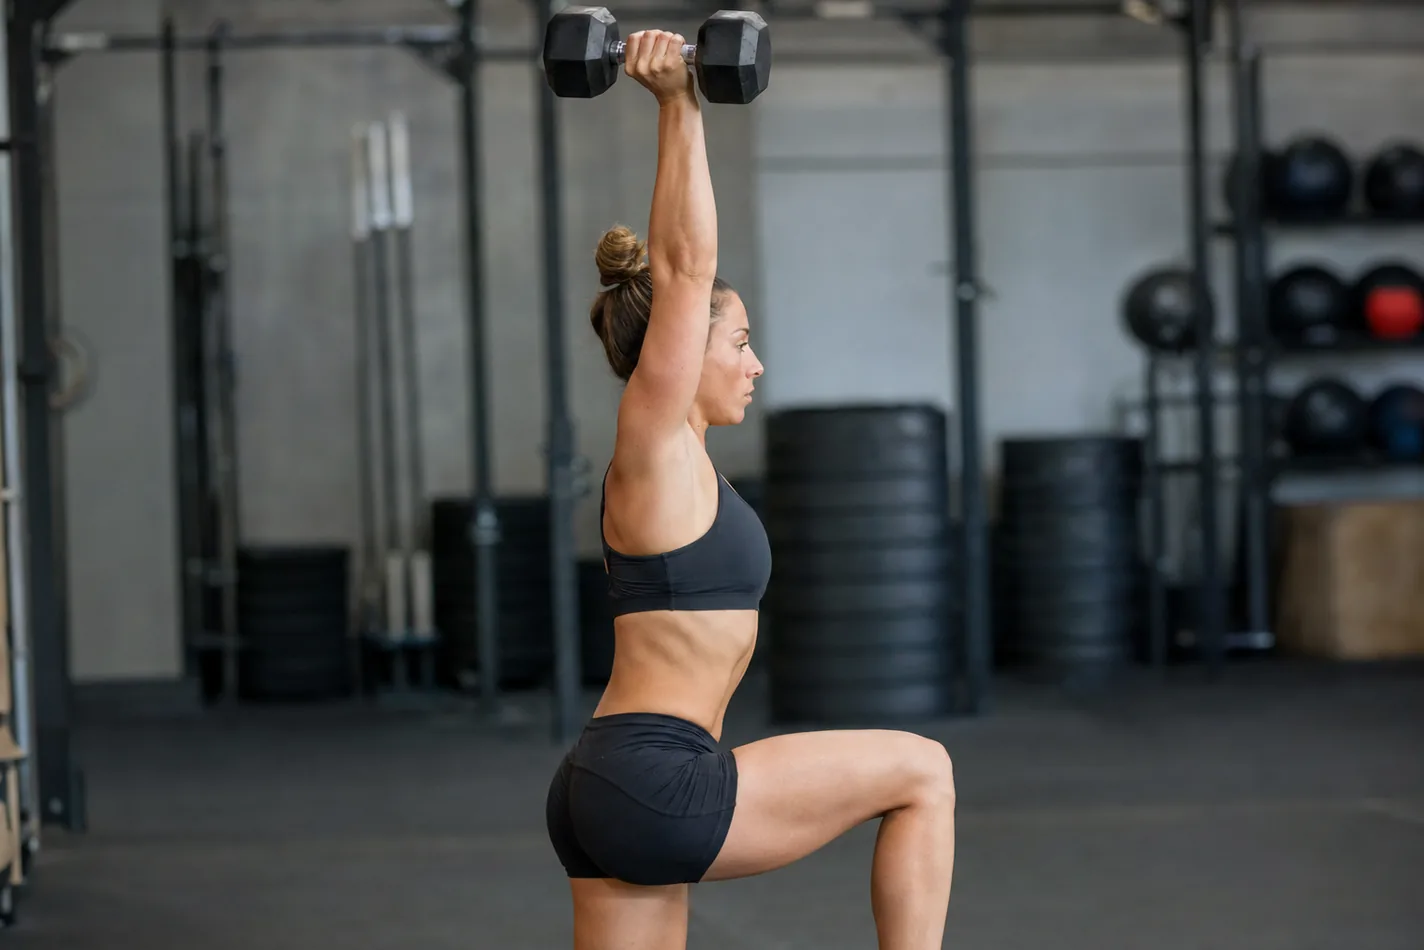
Set the lockout before the walk starts
Press or push press the weight overhead, then pause. The wrist should be close to stacked over the elbow and shoulder. The biceps should be near the ear without forcing the head forward. If the athlete has to lean away from the weight just to make the position happen, the carry is already too heavy.
Before the first step, take one quiet breath and check the line. Glutes lightly on. Ribs down. Eyes forward. Shoulder active, but not jammed into the ear. The free arm can hang by the side. If it starts flailing, the athlete is probably using it to save balance instead of fixing the overhead position.
| Fault | What it usually means | Fix before the next set |
|---|---|---|
| Weight drifts behind the head | The athlete is losing shoulder position or arching to keep the load up | Lower the load and reset the wrist over the shoulder |
| Ribs flare on every step | The back is creating the lockout instead of the shoulder | Exhale, bring the ribs down, and shorten the distance |
| Elbow keeps bending | The load is too heavy for a steady overhead walk | Use a lighter dumbbell or switch to a rack carry |
| Feet get narrow and rushed | The athlete is chasing balance instead of owning it | Slow the walk and use normal steps |
Where waiter walks fit in CrossFit training
Waiter walks work best as accessory work, warm-up prep, or a skill piece inside a conditioning workout. They make sense after a CrossFit warm-up, before overhead lifting, or as a shoulder stability station mixed with carries, step-ups, rowing, or light gymnastics.
They are not the best choice when the workout already has a huge overhead dose. If the shoulders are cooked from snatches, handstand push-ups, or heavy jerks, more overhead walking may just teach tired positions. In that case, front rack carries, farmer carry grip, or suitcase carry control can keep the carry stimulus without forcing another shaky lockout.
The clip below is useful because it shows the movement at the speed most athletes should learn it. Watch the locked-out arm, then watch whether the rib cage follows the weight forward.
Load, distance, and side switching
Start lighter than ego wants. A clean 25 to 50 feet per arm teaches more than a heavy walk that turns into a backbend. Kettlebells can feel more forgiving for some athletes because the bell sits behind the hand. Dumbbells make the wrist and shoulder stack easier to see. Either tool works if the position stays honest.
Switch sides before the locked-out arm gets messy. In a class setting, planned breaks are usually better than waiting for failure. If the first arm looks solid and the second arm falls apart, that is useful information, not a reason to hide the weak side by rushing.
Scaling options that still train the overhead line
Good CrossFit scaling keeps the lesson and removes the piece that is failing first. If overhead mobility is the blocker, use a lighter load or a shorter lane. If the athlete cannot keep the ribs down, switch to a single-arm front rack carry. If balance is the issue, use a march in place before walking across the room.
Coaches can also use bottoms-up kettlebell holds, tall-kneeling presses, or static overhead holds as prep, but the carry should not become a circus trick. The goal is a stacked, repeatable overhead position while the athlete moves through space.
What to check before adding weight
Film ten steps from the front and ten from the side. The questions are simple. Does the wrist stay over the shoulder? Do the ribs stay quiet? Does the athlete keep walking normally, or does every step look like a rescue mission? Add weight only after those answers look boring.