The plan
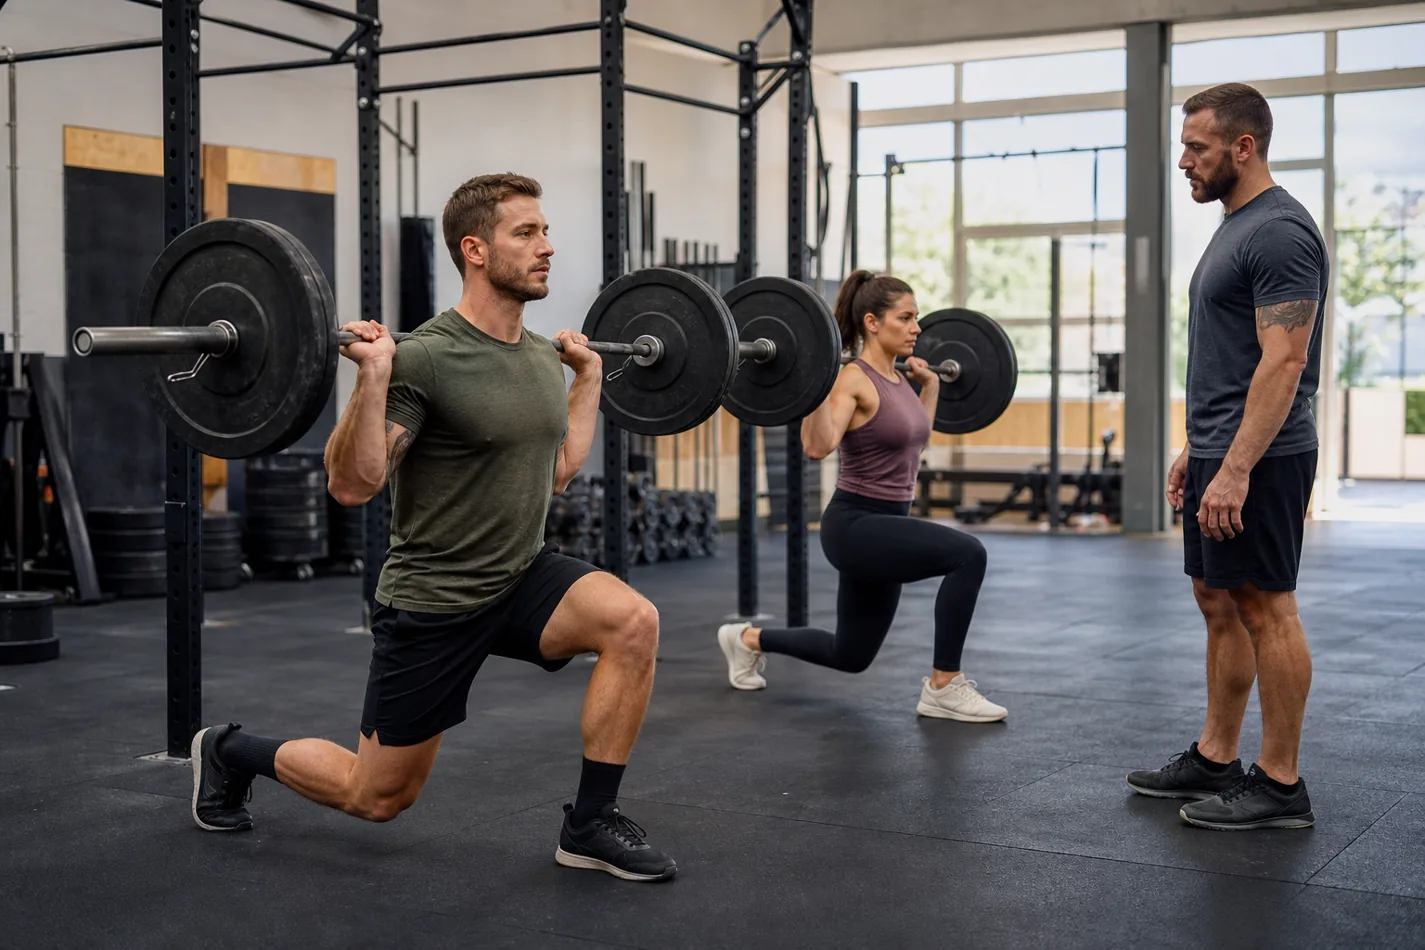
The back rack lunge is not just a squat variation with one leg in front. In CrossFit, it usually appears when the athlete is already breathing hard, the bar is sitting on tired shoulders, and every small step error starts to show.
Done well, it teaches leg strength, trunk control, and patience under a loaded bar. Done badly, it turns into a sideways fight where the front knee dives, the back foot wanders, and the bar rolls around instead of staying quiet.
- The bar should feel stable across the upper back before the first step.
- Step long enough to give the front knee room, but not so long that you lose the back leg.
- Use controlled sets before adding load or speed. Lunges expose sloppy balance fast.
What the back rack lunge trains
A back rack lunge loads one leg at a time while the bar rests behind the neck, similar to the top position of a back squat setup. The movement asks the athlete to keep the torso stacked while the front leg drives out of the bottom.
That makes it different from unloaded walking lunge mechanics. The bar adds pressure to the upper back and punishes any twist through the trunk. It also feels different from a front rack position, where breathing and elbow position can become the main limiter.
Set the bar before you step
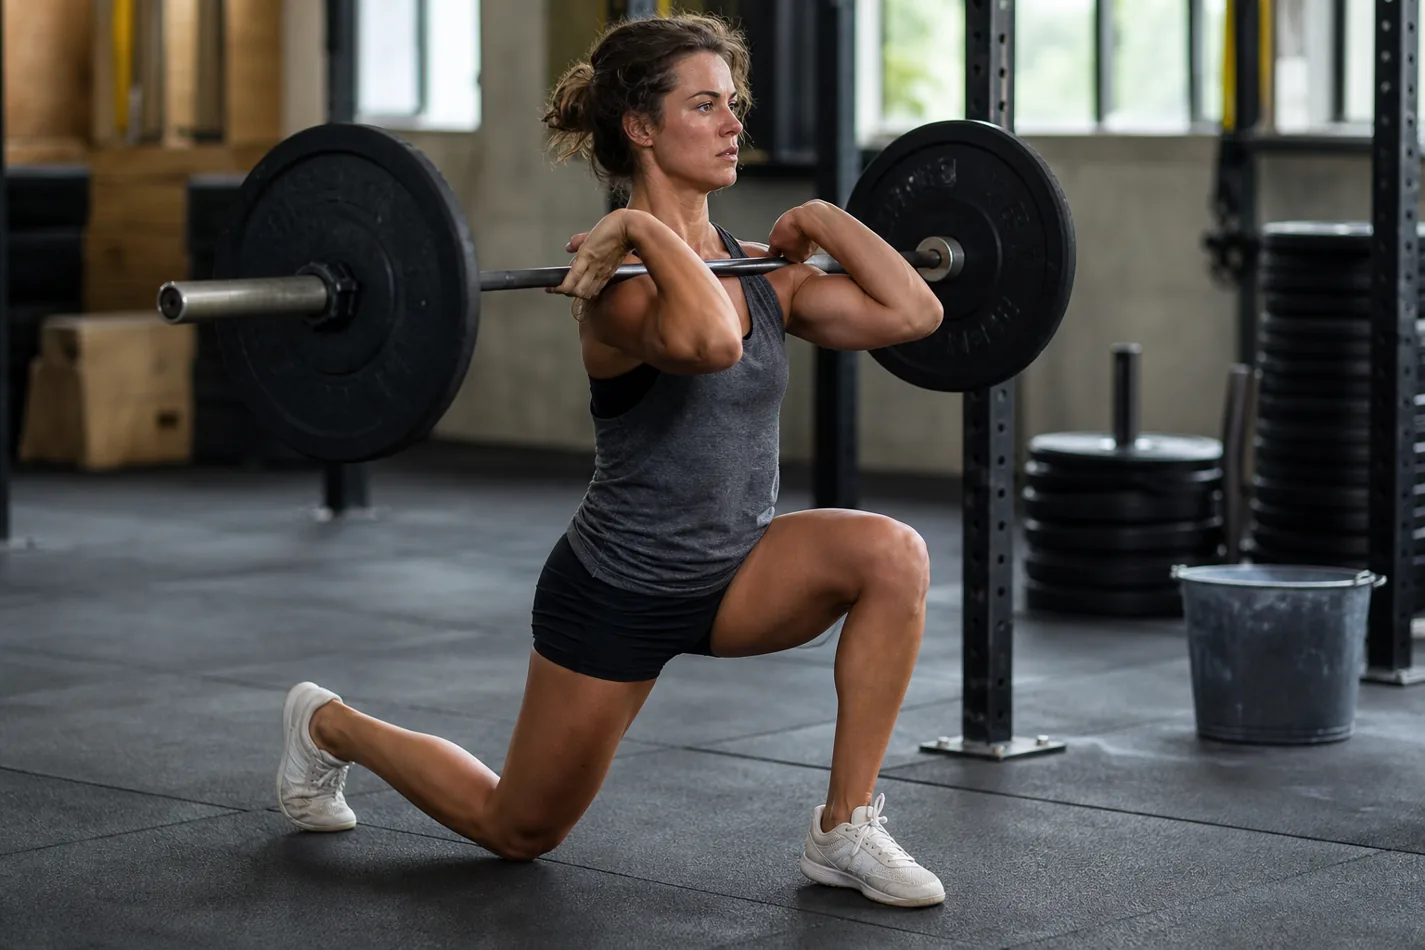
Start with the bar sitting on the traps, not on the neck. Hands should be even, elbows slightly down, ribs stacked over the pelvis. If the bar already feels crooked while standing still, the lunge will not clean it up.
Before the first rep, take one quiet breath and brace lightly. You do not need to over-squeeze everything. You need enough tension to keep the bar from sliding when the feet move.
Choose the step that fits the workout
Forward, reverse, and walking lunges all work, but they do not feel the same. A forward step can be more demanding on braking and knee control. A reverse step often lets athletes keep the front foot planted and focus on driving through the floor. Walking lunges add rhythm, which helps some athletes and rushes others.
If the workout is heavy or the athlete is new to loaded lunges, the reverse lunge control is often the cleaner teaching choice. If the workout calls for distance, use a walking pattern and keep each step boring. The rep should look repeatable, not heroic.
| Fault | What it looks like | Better cue |
|---|---|---|
| Front knee collapses | The knee dives inside the foot as the athlete stands | Drive the knee over the middle toes |
| Bar rolls on the back | The shoulders twist or one elbow drops | Reset the hands and squeeze the upper back |
| Step is too short | The front heel lifts and the athlete feels jammed | Step a little farther before descending |
| Rushing the bottom | The back knee crashes down and balance changes every rep | Touch softly, then drive through the front foot |
Where it fits in CrossFit programming
Back rack lunges fit well as strength accessory work after squats, as a unilateral piece in mixed conditioning, or as a controlled leg builder when the day already has enough pulling and pressing. They pair naturally with goblet squat depth, step-ups, and other leg work that teaches clean foot pressure.
They can also expose athletes who squat well with two legs but lose position when the stance splits. That is useful feedback. A clean lunge tells you the athlete can create force on one leg without borrowing balance from the barbell.
The demo below is useful because it shows the bar sitting quietly on the back while the legs do the work. Watch the torso and the front foot before you worry about loading.
Loading and pacing without making it ugly
For strength work, start with three or four sets of 6 to 10 reps per leg. Keep the load light enough that the last two reps look like the first two. For conditioning, choose a weight that lets the athlete keep moving without turning every rep into a max effort stand-up.
In class, place lunges after a short CrossFit warm-up that includes split-stance patterns. A few unloaded reps, then light bar reps, will tell you more than a long speech. If the knee, foot, or bar path changes immediately, scale before the clock starts.
Scaling choices that still train the pattern
The first scale is load. Use an empty bar, dumbbells at the side, or a goblet position if the back rack bothers the shoulders. The second scale is range. Shorten the depth until the athlete can control the front knee and keep the heel down.
A good CrossFit scaling option should keep the single-leg demand without turning the rep into survival. Some athletes will do better with step-ups. Others may need static split squats before moving through space. Advanced athletes can compare the back rack version with the overhead lunge lockout, but only after the basic step stays calm.
What to check before the next loaded set
Film one set from the side and one from the front. Look for a quiet bar, a front foot that stays planted, and a knee that tracks the same way on every rep. If those three checks pass, add a little load or a few reps. If one fails, fix the step before the workout turns it into a habit.