The plan
The Spiderman stretch is one of those CrossFit warm-up drills that can look useful or completely pointless depending on the first two seconds. Done well, it opens the front hip, wakes up the adductors, and gives the athlete a better lunge position before squats, running, burpees, or floor work.
Done badly, it becomes a twisted push-up stance with the front heel floating and the knee falling wherever it wants. That version does not prepare much. It just burns time while the class waits for the barbell.
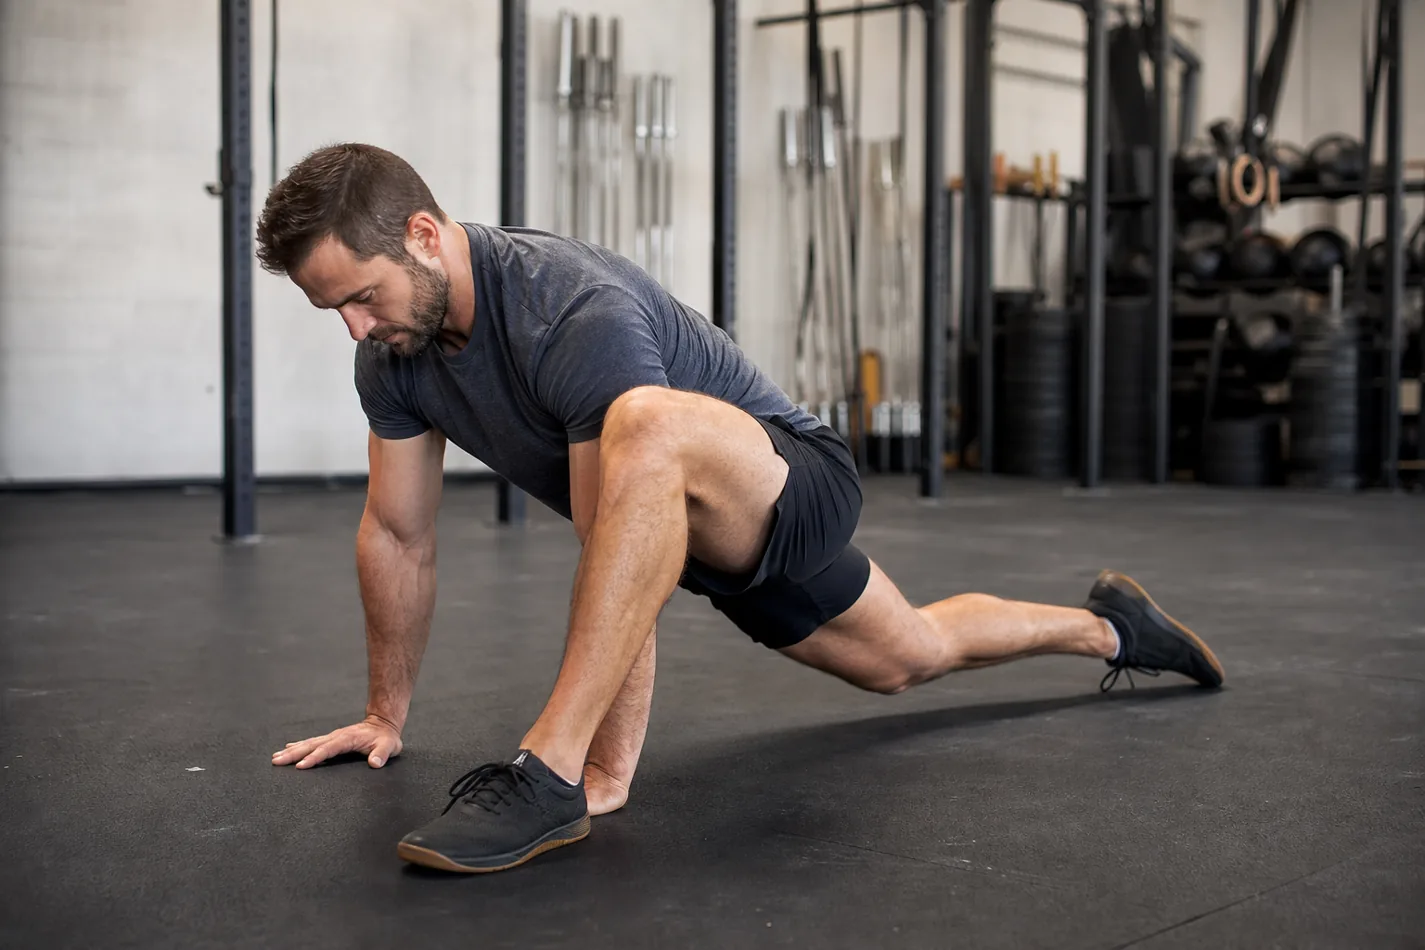
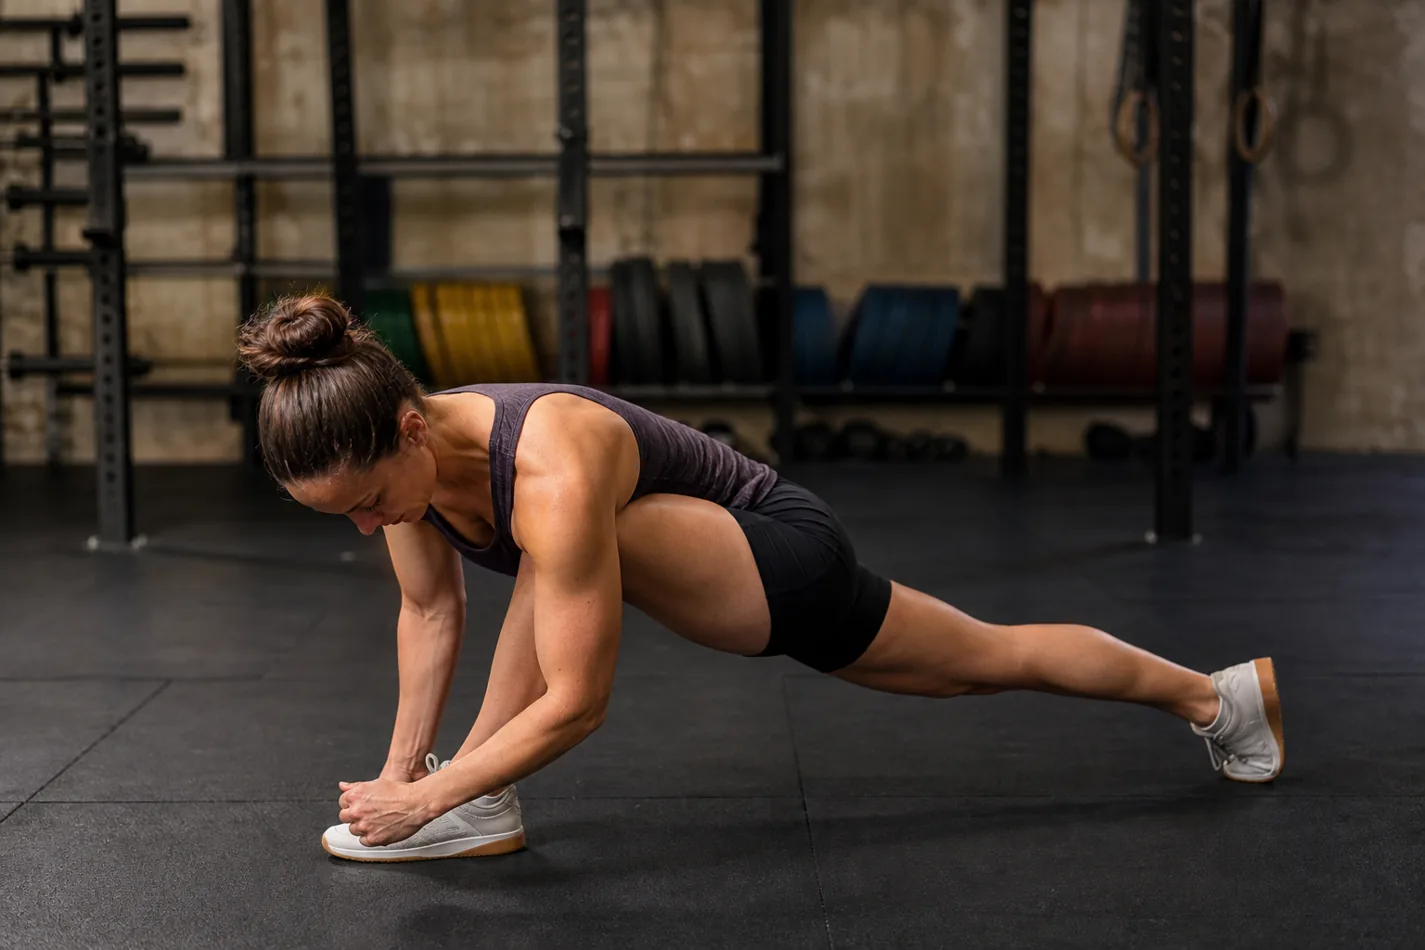
- Place the front foot outside the hand and keep the whole foot heavy.
- The front knee should track with the toes. If it collapses, shorten the range.
- Use the drill before lunges, squats, shuttle work, burpees, wall walks, and any WOD that needs cleaner hip position.
What the Spiderman stretch is trying to fix
The drill puts the athlete in a long lunge with the hands on the floor. The front foot steps outside the hand, the back leg reaches long, and the hips sink only as far as the athlete can stay organized. The goal is not to smash the hip to the floor. The goal is to find a range where the front foot stays flat, the knee tracks, and the athlete can breathe.
That position carries over to a lot of CrossFit work. It helps athletes feel the difference between opening the hip and dumping pressure into the low back. It also gives coaches a quick read on side-to-side differences before the workout starts. If one side feels blocked and the other side moves easily, that is useful information.
Set the foot before you chase depth
The front foot does most of the talking. If it rolls to the inside edge or pops onto the toes, the athlete is probably looking for depth in the wrong place. Bring the foot a little wider, keep the heel down, and let the hip settle back and down instead of forcing the knee forward.
This is the same idea behind good lateral lunge control and a clean reverse lunge. The knee can move, but it should not dive inward every rep. If the athlete cannot keep the line without load, a heavy front rack or overhead variation will not make it better.
| Fault | What it looks like | Fix |
|---|---|---|
| Front heel lifts | The athlete rocks forward and loses the whole foot | Move the foot wider and reduce the hip drop |
| Knee falls in | The front knee cuts across the foot | Track the knee with the toes and slow the return step |
| Back leg goes slack | The rear knee bends and the hip loses tension | Reach the back heel long and keep the glute lightly active |
| Shoulders collapse | The athlete hangs on locked elbows with no control | Press the floor away and keep the chest broad |
Where it fits in a CrossFit warm-up
The Spiderman stretch works best before training that asks for hip range and fast position changes. Use it before squats, step-ups, lunges, shuttle runs, burpees, bear crawls, wall walks, and mixed conditioning workouts where athletes have to move from the floor to their feet without folding in half.
It also pairs well with the Samson stretch because the two drills attack different problems. Samson opens the back hip in a taller lunge. Spiderman puts more demand on the front hip, adductor, and foot position. Before front squats, that pairing can clean up the first few warm-up sets without turning the class into a mobility seminar.
The video below gives a clean reference for the shape. Watch the front foot, then the space between the front knee and hip. If the knee wanders or the back leg loses tension, slow the drill down before adding reps.
How many reps make sense
For a general warm-up, five slow steps per side is enough. Step into the position, pause for one breath, then step back or switch sides. If the class needs more mobility, hold each side for twenty seconds and add a small controlled shift forward and back.
Do not rush the drill just because it is familiar. Fast Spiderman reps often turn into sloppy mountain climbers. That can be fine for conditioning, but it is not the same stimulus. If you want a crawling pattern, use something like inchworms or bear crawl work. If you want hip prep, slow the rep down and make the athlete own the foot.
How to scale it for stiff hips or cranky wrists
The easiest scale is elevation. Put the hands on plates, parallettes, a low box, or the rig upright. That gives the athlete space to keep the chest up and the foot flat. A newer athlete may get more out of a slightly higher position than from forcing the hands to the floor and twisting around the hip.
For wrist discomfort, use fists, dumbbell handles, or an elevated surface. For athletes who lose midline control as soon as the leg steps forward, add a quick hollow body check first. Ribs down and pelvis organized will make the lunge position less random.
When to skip it
A strong stretch is fine. A sharp pinch in the front hip is not. If the athlete feels pinching, numbness, or knee pain, change the range or choose a simpler lunge drill for the day. Mobility prep should make the next piece easier to start, not leave the athlete guessing whether something is irritated.
On days with heavy fatigue from wall walks or handstand work, keep the upper body relaxed enough that the drill does not become another shoulder station. The hips are the target. The hands are there to support the position.
What to check before using it in class
Ask for three controlled reps per side. The front foot stays flat. The knee tracks with the toes. The athlete can breathe in the bottom position without twisting away from the working hip.
If those three things hold, the Spiderman stretch belongs in the warm-up. If they do not, make it higher, shorter, or slower. The drill only works when the athlete can feel the position they are supposed to take into the workout.