The plan
Glute bridges are one of those drills athletes rush through because they look too simple to matter. Lie down, bend the knees, lift the hips. Done. Then the low back arches, the ribs pop up, and the hamstrings cramp before the glutes ever do much work.
Used well, the glute bridge gives CrossFit athletes a clean way to feel hip extension without a barbell, box, or clock in the way. It is not glamorous. It is a small drill that can clean up bigger lifts when the athlete actually pays attention.
- Set the feet close enough that the athlete can drive through the heels without hamstring cramping.
- Finish with the hips tall, ribs down, and glutes squeezed. Do not chase height by arching the low back.
- Use glute bridges in warm-ups, rehab-style accessory work, or before hinge and squat sessions that need better hip drive.
What a good glute bridge should feel like
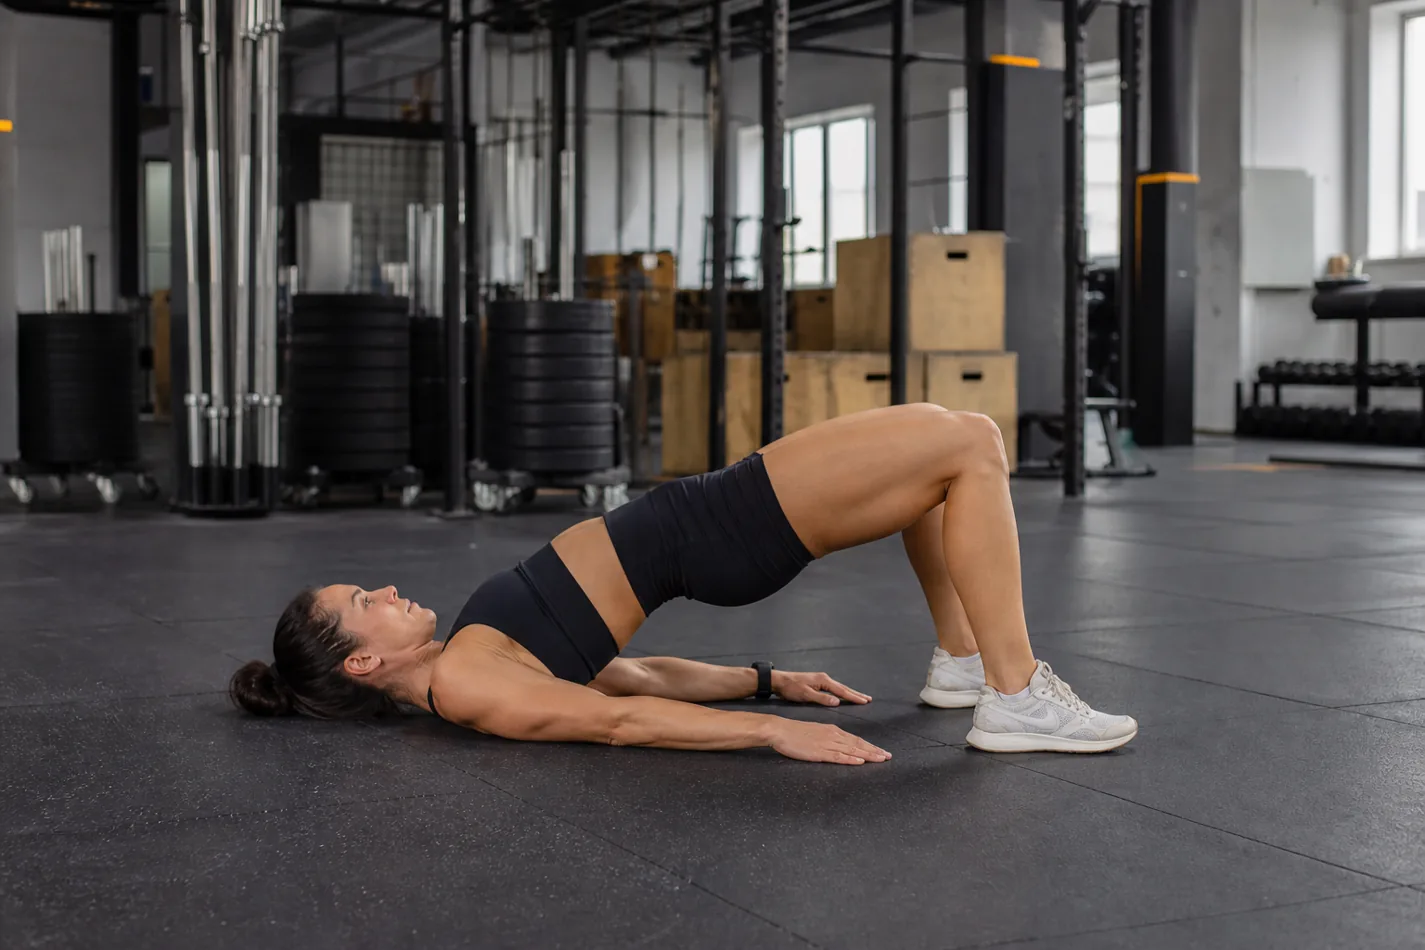
Start on the floor with the knees bent, feet flat, and arms relaxed. The feet should sit roughly under the knees at the top of the rep. Before lifting, tuck the belt line slightly and keep the ribs from flaring. Then drive the hips up until the body forms a straight line from shoulders to knees.
The top position should feel like the glutes are doing the work. If the low back pinches or the hamstrings grab first, the setup needs work. That same finish matters in GHD hip extensions, deadlifts, and any hinge where the athlete has to extend the hips without dumping tension into the spine.
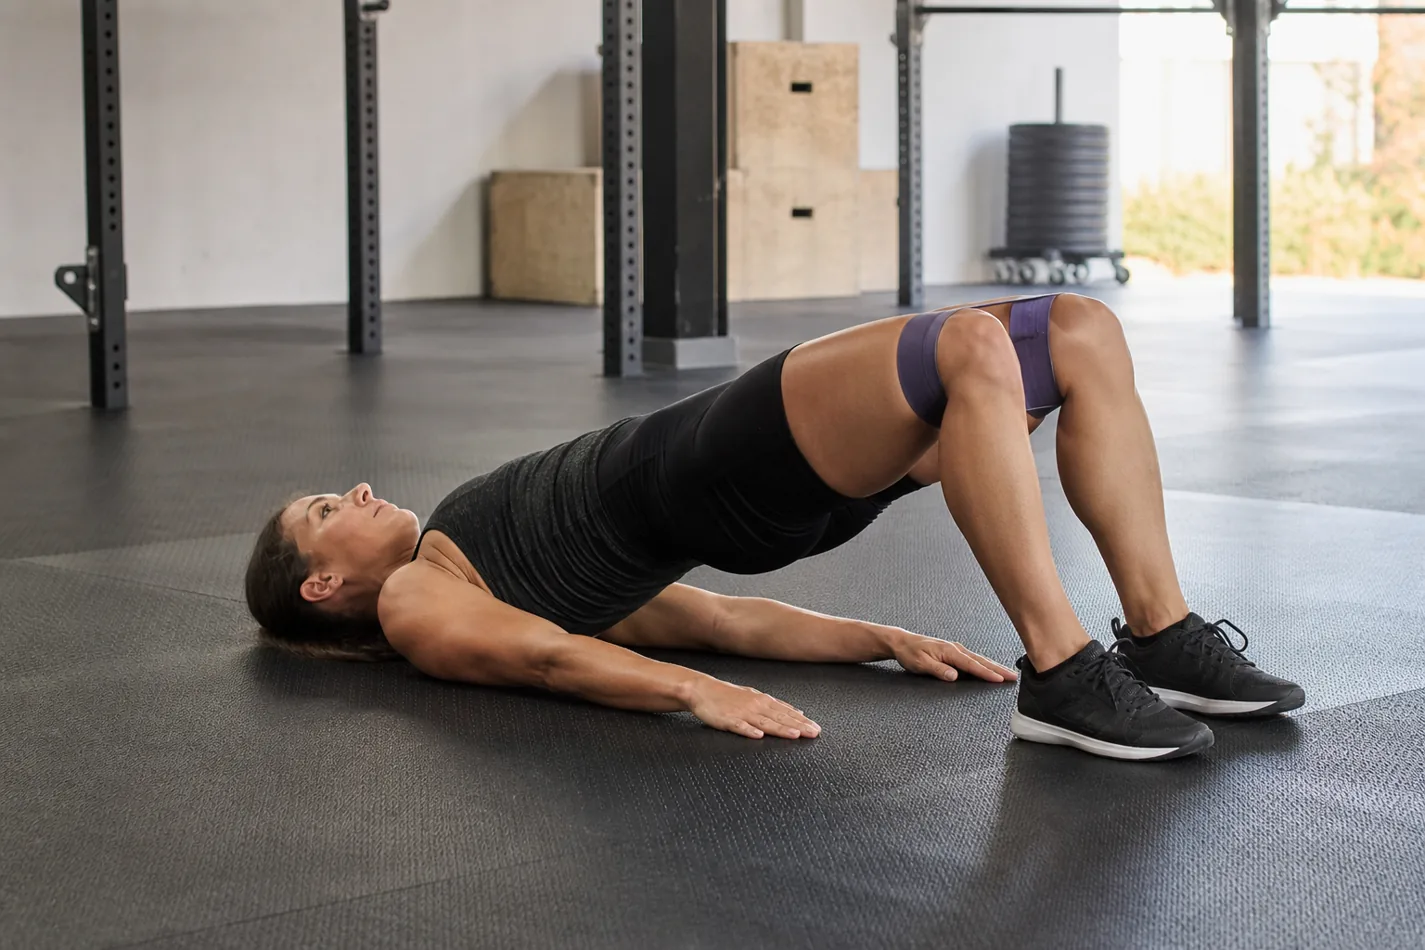
The ribs decide whether this is glutes or low back
Most bad glute bridges fail at the rib cage. The athlete lifts the hips, then tries to get higher by arching. From the side, the rep looks big. From the body, it feels like the low back is doing overtime.
Keep the front of the ribs quiet. Squeeze the glutes hard at the top and pause for one count. If the athlete cannot hold that position without losing the brace, lower the range. A smaller bridge with real hip drive beats a tall bridge with a cranky back.
| Fault | What you see | Fix |
|---|---|---|
| Low back arch | The ribs lift and the hips chase extra height | Tuck slightly before the rep and pause lower |
| Hamstring cramp | The athlete feels the back of the leg more than the glutes | Move the feet a little closer and drive through the whole foot |
| Knees cave in | The knees drift together at the top | Press the knees out gently or use a light band |
| No pause | The athlete bounces through every rep | Hold the top for one count and own the squeeze |
Why CrossFit athletes should not treat it as filler
A good bridge teaches the finish of hip extension without the noise of a heavy lift. That matters when athletes struggle to stand tall in a clean, lose position during squats, or finish a hinge by leaning back instead of using the hips.
It also helps before single-leg work. If an athlete cannot feel both glutes on the floor, lunges under fatigue will usually show the same leak with more moving parts. The bridge gives coaches a low-cost way to spot the problem before the workout makes it expensive.
The demo below is useful because the movement stays quiet. Watch the foot position, the ribs, and the pause at the top before adding bands or loading.
How to make glute bridges harder without making them worse
The first progression is time. Hold the top for two or three seconds while keeping the ribs down. Then add a band around the knees if the athlete needs feedback on knee position. A single-leg bridge comes later, only when the athlete can keep the pelvis level.
Loading can work too, but it should not be the first answer. A dumbbell or plate across the hips makes sense when the bodyweight version is clean. If the athlete has to throw the hips up to move the load, the drill has stopped teaching what you wanted.
Where to put them in a session
Glute bridges fit best before hinge, squat, running, or posterior-chain work. In a CrossFit warm-up, two sets of eight to twelve clean reps are usually enough. The goal is not fatigue. The goal is to help the athlete find the hips before the barbell or workout pace arrives.
They can also sit after training as accessory work, especially for athletes who need more control through the hips. Pair them with dead bugs, light RDLs, or controlled step-ups. Keep the reps honest. Once the low back starts helping, the set is over.
How to use glute bridges in training
Start simple: three sets of ten, one-second pause at the top, normal breathing, no race. If the athlete can keep the ribs down and feel the glutes every rep, add a longer hold, a light band, or a single-leg variation next time.
If the drill feels boring, that may be the point. Glute bridges are not there to impress anyone. They are there to teach a quiet hip finish that shows up later when the workout gets loud. Good CrossFit scaling keeps that lesson clear instead of turning every accessory piece into another score.