The plan
The bear crawl looks simple until it shows up in a CrossFit workout with a clock running. Then the small things start to matter. Your hips drift high. Your shoulders burn. Your breathing gets choppy. What should be a controlled crawl turns into a noisy fight across the floor.
Good bear crawls are not about looking animalistic or moving as fast as possible. They are about keeping the trunk organized while the opposite hand and foot move together. When that rhythm holds, the movement trains shoulders, core, hips, and conditioning without turning every lane into a mess.
- A CrossFit bear crawl should stay low, braced, and quiet. If the hips bounce, the midline is already leaking.
- Small steps beat long reaches. The goal is steady pressure through the hands, not a lunge across the floor.
- Scale distance, speed, or knee height before shoulder fatigue forces sloppy reps.
What a bear crawl is testing
A bear crawl is a loaded moving plank. The hands press into the floor, the feet drive the body forward, and the trunk has to resist rotation every time one hand leaves the ground. That is why it feels different from a jog, a burpee, or a simple core drill. You are breathing under shoulder load while your hips keep trying to twist.
In CrossFit, bear crawls usually appear as a short conditioning piece, a warm-up drill, a partner workout station, or a low-skill movement that gets hard because of fatigue. They can also expose the same body-control problem that shows up in wall walk control: athletes rush the hands, lose the ribs, and let the hips do whatever they want.
Set up low before you move fast
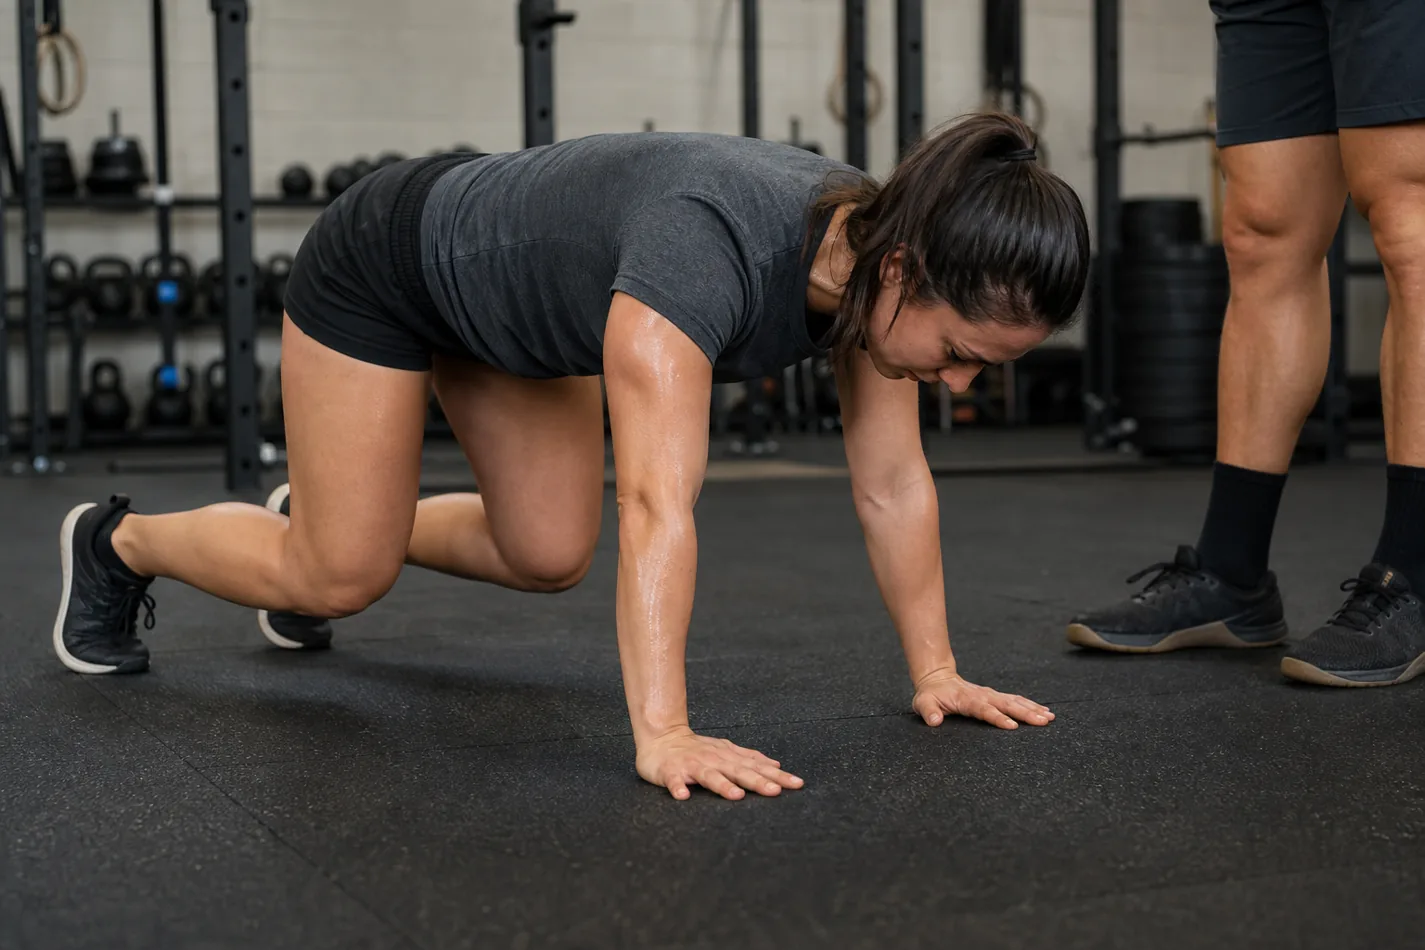
Start on hands and knees. Put your hands under your shoulders, knees under your hips, then lift the knees an inch or two from the floor. Keep the back flat enough that a coach could place a hand on it without watching you wobble around. The neck stays neutral. Look slightly ahead of your hands, not straight up at the rig.
From there, move the right hand with the left foot, then the left hand with the right foot. Keep the steps short. A long reach usually turns the crawl into a shoulder stretch on one side and a hip hike on the other. If you hear your feet slapping the floor, slow down. Quiet crawls usually mean better control.
The pacing mistake that ruins bear crawls
Most athletes go out too hot. They sprint the first ten feet, stand up already breathing hard, then spend the next round crawling like their arms belong to someone else. A better pace feels almost boring at the start: short steps, steady exhale, eyes down, hips low.
| Problem | What it usually means | Fix it in the next rep |
|---|---|---|
| Hips popping high | The athlete is trying to unload the shoulders | Shorten the steps and keep the knees closer to the floor |
| Feet slapping loudly | The crawl has lost rhythm | Move slower and place the feet instead of kicking them forward |
| Low back sagging | The brace is gone | Exhale, tuck the ribs slightly, and reset the knee height |
| Shoulders burning early | Too much reach or too much weight dumped into the hands | Take smaller hand steps and push the floor away |
This is also where shuttle run footwork carries over. Both movements punish sloppy direction changes. In a shuttle run you have to decelerate before the line. In a bear crawl you have to keep the crawl organized before fatigue asks you to twist, reach, or stand up too early.
How to scale bear crawls without missing the point
Scaling a bear crawl does not mean turning it into something random. Keep the pattern, reduce the demand. Shorten the distance first. If the workout asks for 50 feet, use 25 feet with a clean turnaround. If the shoulders are the limiter, allow brief breaks instead of crawling with a collapsed upper back.
For newer athletes, a knees-down crawl can work during warm-ups, but it changes the stimulus. Another option is a slow bear hold with shoulder taps, as long as the athlete can keep the ribs and hips steady. For bigger conditioning pieces, CrossFit scaling should protect the intended pace. If everyone else is moving continuously and one athlete is stuck in a failed crawl for two minutes, the scale is wrong.

Where bear crawls fit in training
Bear crawls work best when they have a reason. Put them in a warm-up to wake up the shoulders and trunk. Use them in a conditioning workout when you want low-impact fatigue that still makes athletes breathe. Pair them with carries, sled work, or moderate machine calories when the goal is steady output rather than a max-effort sprint.
They pair well with sled push body angle because both reward a strong body line under fatigue. The difference is that sled work lets the legs drive harder, while the bear crawl asks the hands, trunk, and hips to share the load. That makes it useful, but also easy to overdo if the workout already includes push-ups, wall walks, handstand work, or heavy overhead pressing.
If the movement still looks like a fast plank with panic added, watch CrossFit Movements - How to do a Bear Crawl before class. The useful detail is the low, quiet body position: hands moving under the shoulders, knees close to the floor, and the torso staying braced instead of swaying side to side.
Common coaching cues that actually help
- Stay small: short steps keep the crawl from turning into a lunge.
- Push the floor away: active shoulders feel better than hanging on the joints.
- Keep the knees low: one or two inches off the floor is enough for most athletes.
- Breathe before you need air: holding the breath makes the shoulders burn faster.
- Turn with patience: rushed turns are where most athletes lose their brace.
What to check before your next WOD
Before the clock starts, test five slow steps forward and five back. If you can keep the knees low, shoulders active, and breathing steady, you are ready to add speed. If your hips pop up on the third step, fix that first. In a workout, the athlete who crawls clean at 80 percent usually beats the athlete who sprints ten feet and spends the rest of the round negotiating with the floor.