The plan
The front squat looks simple until a workout asks for sets under fatigue. Then the small things show up fast: elbows drop, the bar rolls forward, heels get light, and every rep starts to feel like a fight against your own position.
For CrossFit athletes, the front squat is not just a strength lift. It feeds thrusters, cleans, wall balls, squat cleans, and any WOD where your legs need to work while your breathing is already messy. The fix is not always more weight. Most athletes need a better rack, a calmer brace, and a tempo they can repeat.
- In a CrossFit front squat, the rack position usually breaks before leg strength does.
- High elbows, full foot pressure, and a quiet brace make the bar path easier to control.
- Use lighter tempo sets before heavy WOD loads if your wrists, upper back, or breathing fall apart.
Why the front rack matters more than your one rep max
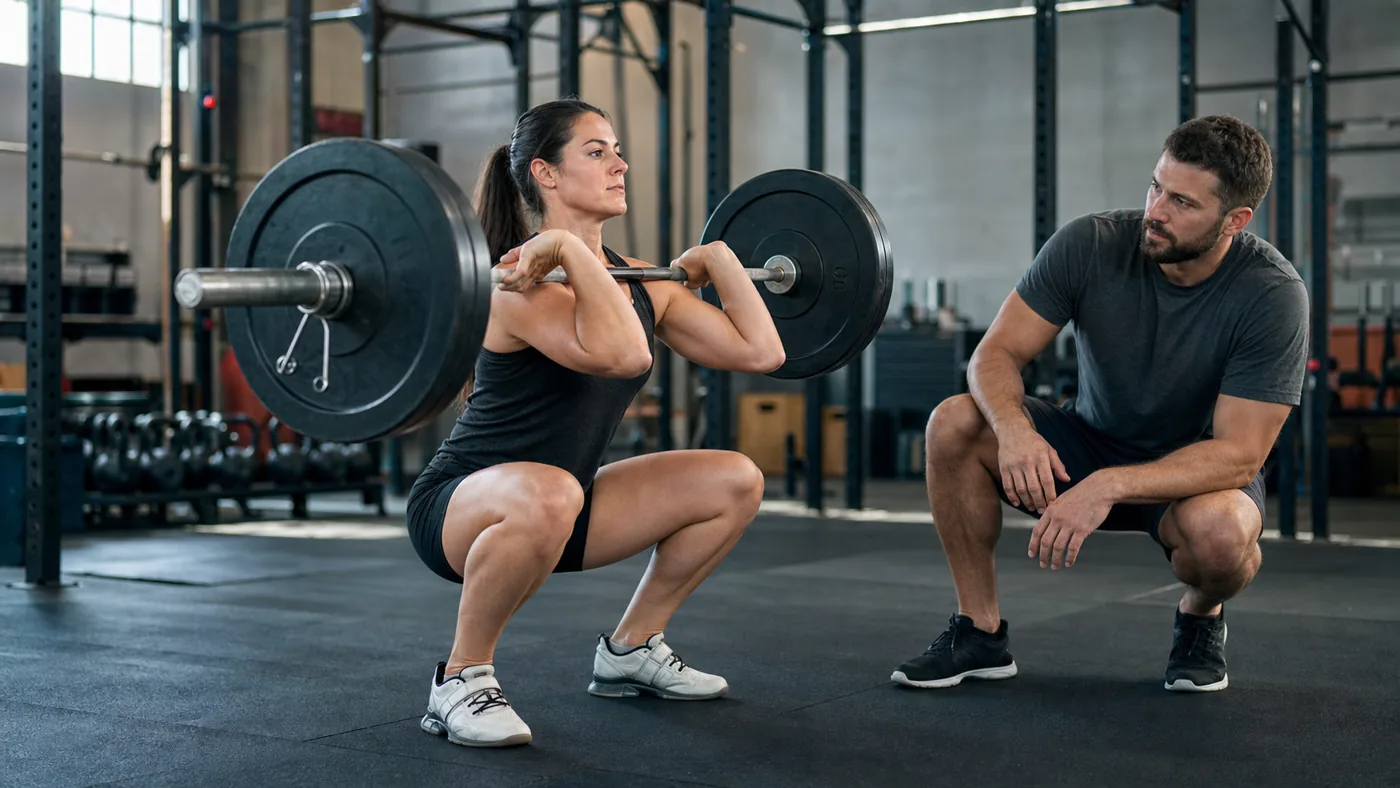
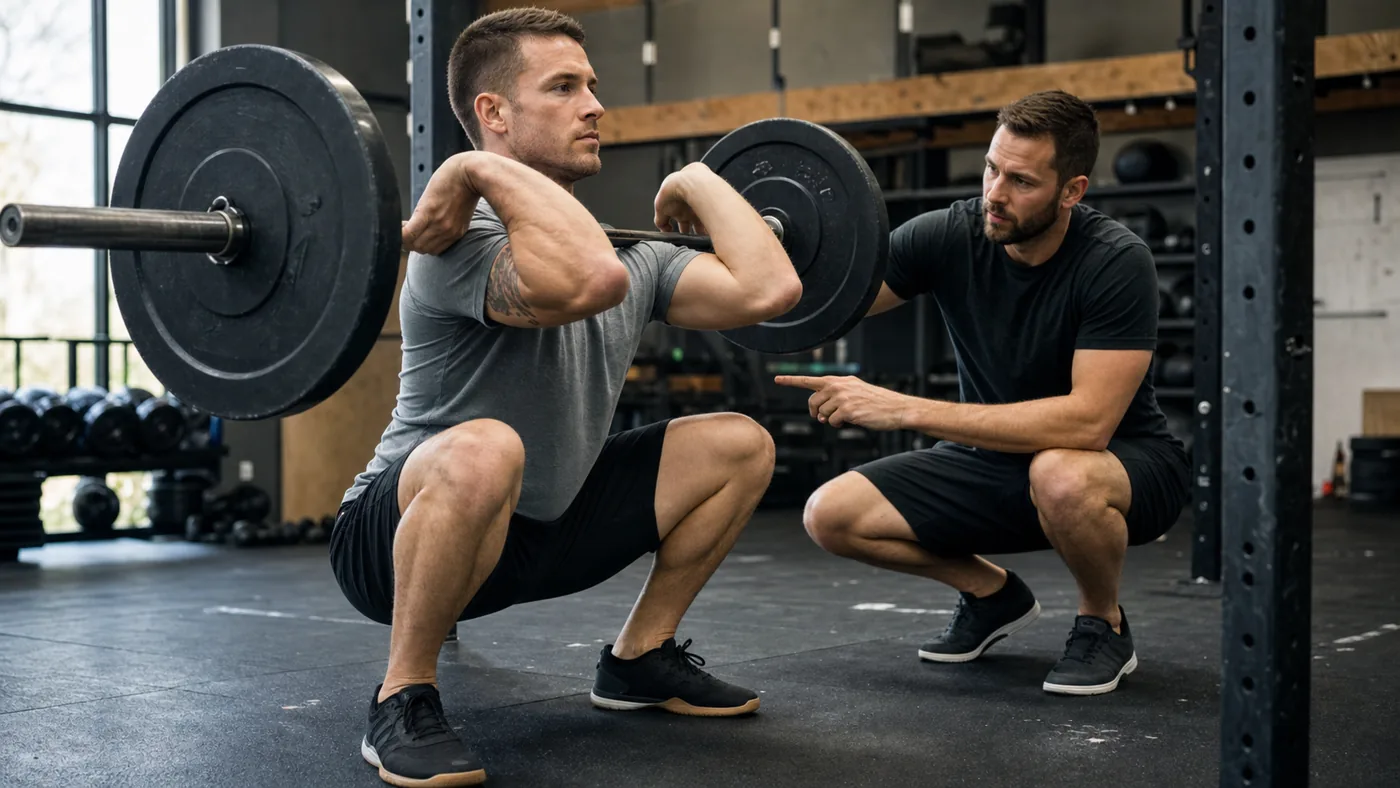
A strong front squat starts before you descend. The bar should sit across the shoulders, close to the throat, with the hands acting more like guides than hooks. If you are holding the bar in your palms, your wrists take the load and your elbows drop as soon as the rep gets hard.
Think about driving your elbows forward and slightly up while keeping the ribs down. That combination is awkward at first, but it keeps the bar stacked over the midfoot. If the elbows crash, the bar moves away from your body. Once that happens, the squat becomes a back extension contest.
This is also why athletes who are still learning the kipping pull-up swing often recognize the same problem here: tension has to travel through the whole body, not just the muscle that feels tired first.
The setup checklist before every set
Do not rush the first rep. A clean setup saves more energy than a rushed descent. Before you squat, take one breath, set your feet, and make sure the bar is resting on the shoulders instead of hanging from your hands.
| Checkpoint | What to feel | Common mistake |
|---|---|---|
| Front rack | Bar on shoulders, elbows forward | Holding the bar in the hands |
| Feet | Tripod pressure through big toe, little toe, heel | Rolling to the toes in the bottom |
| Brace | Short breath, ribs stacked over hips | Overextending the low back to lift the chest |
| Descent | Knees track, torso stays tall | Diving into the bottom with no control |
How to descend without losing the bar path
The best front squat descent is boring. You sit between the hips, keep pressure through the whole foot, and let the knees travel as needed while the chest stays tall. If you force the hips back like a powerlifting back squat, the torso tips forward and the bar starts drifting.
Depth matters, but depth without position does not help much. If your elbows are pointing at the floor, scale the load and fix the rack. If your heels pop up, adjust stance, ankle mobility, or tempo. If your brace disappears, take smaller sets and breathe at the top instead of trying to recover in the bottom.
The same idea applies to higher rep pieces. Athletes who struggle with wall ball breathing usually do better when they stop treating every squat as a separate panic rep. Set the rhythm before the workout forces one on you.
A useful video cue to watch
This CrossFit front squat demo is short, but it is useful because it shows the shape you are chasing: tall torso, elbows up, and the bar moving straight over the middle of the foot. Watch the rack position more than the depth.
Drills that clean up the lift fast
Use these before the workout or on a lighter strength day. They are not glamorous. That is the point. They teach the positions you need when the clock gets loud.
- Front rack hold: 20 to 30 seconds with an empty bar or light load. Elbows stay high without the ribs flaring.
- Tempo front squat: three seconds down, one second pause, normal stand. Keep the bar over the midfoot.
- Zombie squat: arms straight forward, bar on shoulders. If the bar rolls, your torso or rack position needs work.
- Pause squat breathing: one light pause in the bottom, then stand. This teaches calm tension instead of panic.
If your wrists complain, do not force a full grip just to look correct. Two or three fingers under the bar can be enough for many athletes. Straps can also help in strength work, but they are not a fix for poor upper back tension.
When to scale the front squat in a WOD
Scale when the movement standard is technically there but the position is not repeatable. That means your first two reps look fine, then the bar starts sliding, your elbows drop, or you need several extra breaths between every squat. A lighter bar moved well will usually beat a heavy bar that turns each round into damage control.
For strength work, missed reps are part of training. In a conditioning piece, ugly reps stack up quickly. If the workout includes cleans, thrusters, or pull-up bar work after squats, protect your grip and shoulders early. You will need them later.
If you are building a broader engine around squat-heavy workouts, compare your pacing with your CrossFit rowing technique. The lesson is similar: smooth reps at a repeatable pace usually age better than one aggressive opening round.
What to check before your next WOD
Before the next workout with front squats, film one warm-up set from the side. Look for three things only: elbows staying high, heels staying down, and the bar moving vertically over the middle of the foot. If those are solid, add load. If one breaks, fix that first.
The front squat rewards patience. Build the rack, own the bottom, and breathe at the top. The bar will feel lighter when you stop fighting bad positions.